Speed up Windows 10 with smart apps management
Consumers who will elect to upgrade to Windows 10 at the end of July, will be offered a smarter way to manage their Windows Store applications, in such a way that their systems will benefit from a substantial boost in performance.
Owners of devices with an additional internal or external drives, especially those whom primary storage is SSD, will be able to automatically install applications from the Windows Store, as well as move existing ones, on an auxiliary storage drive of their choice, by default.
Apps and Features
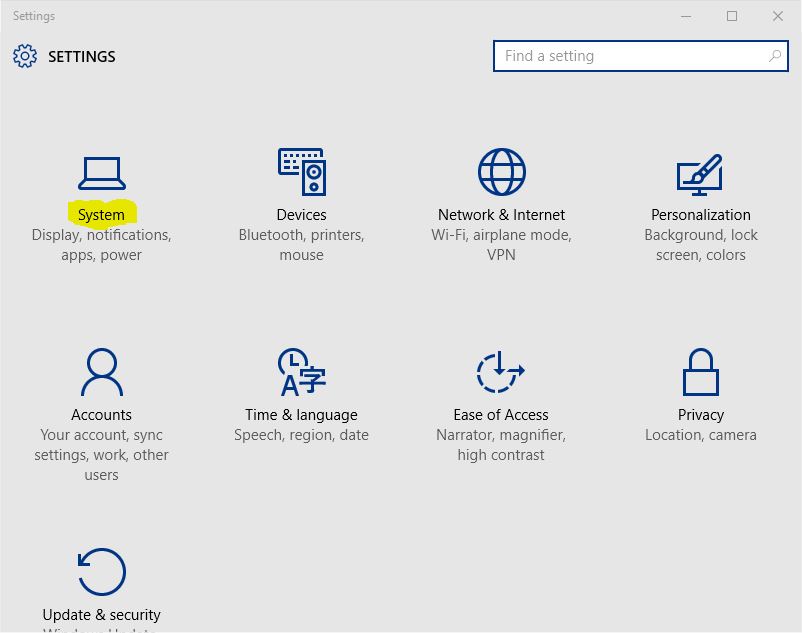
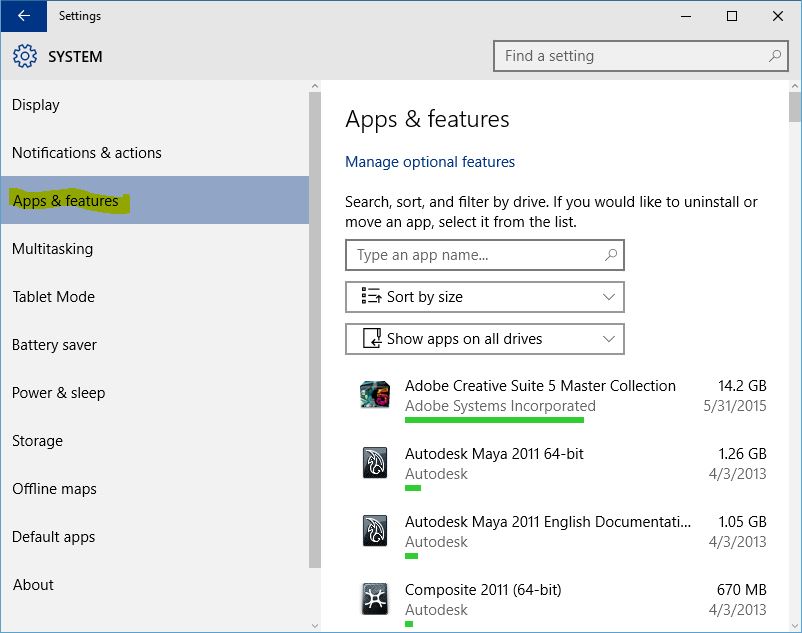
The Apps and Features dialog is part of the whole new redesigned Settings control panel in Windows 10, and can be accessed from the main menu, by selecting “System”, and then “Apps & Features, on the side menu.

The Apps & Features page will load automatically a list of all installed apps, including those installed through the regular Windows Installer, which would be listed under Programs and Features, in older versions of Windows, although the dialog is still available from the “legacy” control panel in Windows 10.

When selecting an application installed through the regular Windows installer, a “Uninstall” button will display, which will serve the same purpose as the one that exists in the legacy dialog.

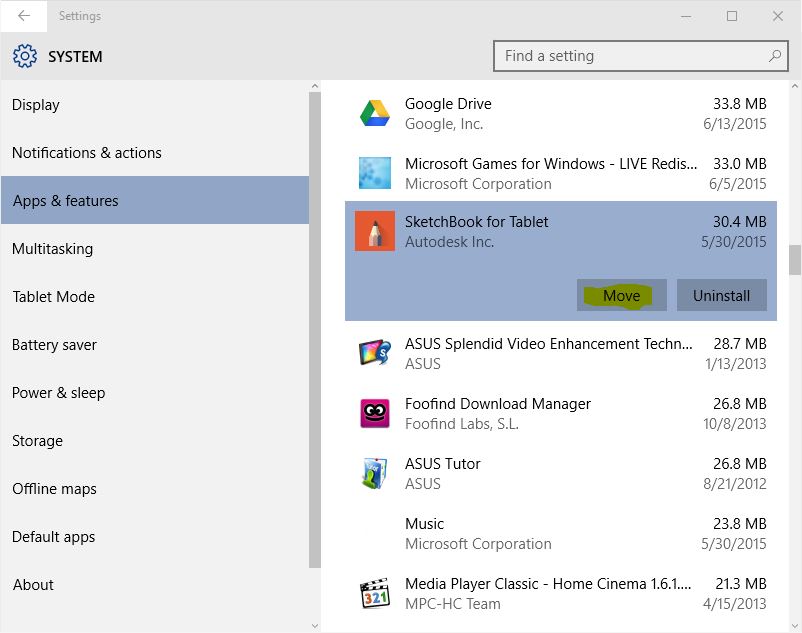
Upon selecting an app installed through the Windows Store, a “Move” button will display alongside the “Uninstall” button. When clicking on the “Move” button, users have the choice of relocating the app to a different drive. The obvious advantage is free space on the local drive for smoother and faster system operations.
Default drive
As mentioned earlier, Windows 10 users will be able to select different default drives to store different items, including pictures, videos, music, documents, and of course, apps. This makes it for an especially nifty feature when needing to manage large playlists that include music and movie purchases, as well as other data saved and downloaded daily, and it’s especially beneficial when it comes to frequently used apps that can require more storage, either temporary or permanent.

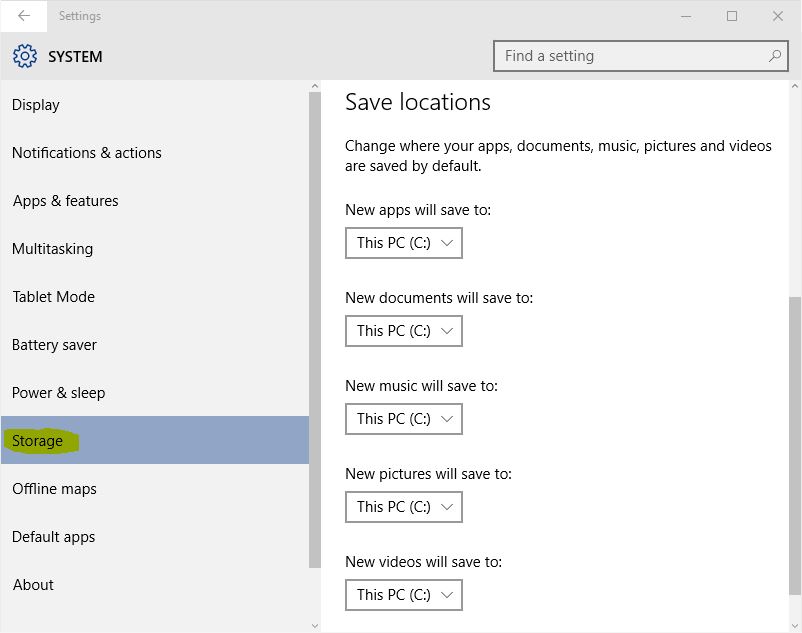
To set default save, and install locations, the “Storage” page in the settings can be opened by selecting “Storage” from the left side menu in the Settings app. When opening the page, a list of all available drives will appear, showing how much room is available for each one.
Scrolling down the page, under “Save Locations”, users will be able to set different locations for different data and apps, using the pull-down menu. By default, all options are set to “This PC(C:)”.
Windows 10 will be available as a free upgrade, July 29th, to all users who own a Windows PC and run a valid Windows license. Those who purchase a new Windows PC or ultraportable, will also be eligible for a free upgrade to Windows 10, which will run for the lifetime of the device.