Cortana and Windows Search on your windows 10 laptop: One of these things is not like the other.

If you have bought a new Windows 10 laptop, or desktop, and this is your first experience on a Windows 10 PC, you may have noticed that Windows 10 has, not one, but two entities dedicated to the search of items on your new PC.
The search box in File Explorer has been the default way of searching for files across all versions of Windows, prior to Microsoft Windows 10, and it relies directly upon Windows indexing service.
The other is Cortana, a voice-activated virtual assistant not unlike Google’s on Android, or Siri on iOS, and as of late, macOS.
While Cortana relies on Windows’ indexing service too, at least for local files, its reach goes beyond what’s on your computer, extending to anything you allow Cortana to know about your Internet activity.
This includes the content of your OneDrive cloud folder, connected social media accounts and services, as well as browsing history with Microsoft Edge.
However, that is not all Cortana does. Microsoft’s own virtual assistant is designed to learn through experience, which also includes anything we say to her, such as location queries, shopping preferences, frequently accessed contacts, and lots more.
Circling back to the Windows indexing service, this component supplies local files and folders information to both Cortana and File Explorer’s search box. With that in mind, Cortana and File Explorer don’t use the indexing service in the same way. Depending on the way you feel more comfortable searching files, Cortana will be more useful for less complex, but more semantic queries, such as “Find me photos from last week”. On the other hand, the search box in File Explorer will be more useful for refined searches that focus on items within a particular folder, for instance all Jpeg files that contain the word “hello” in the name, and are older than two months.
What may not be obvious is that the file indexing service is not comprehensive by default. Certain locations are left out on purpose, such as system folders. Other folders may be excluded because they are on a different storage volume altogether, such as a flash drive, or a secondary hard drive.
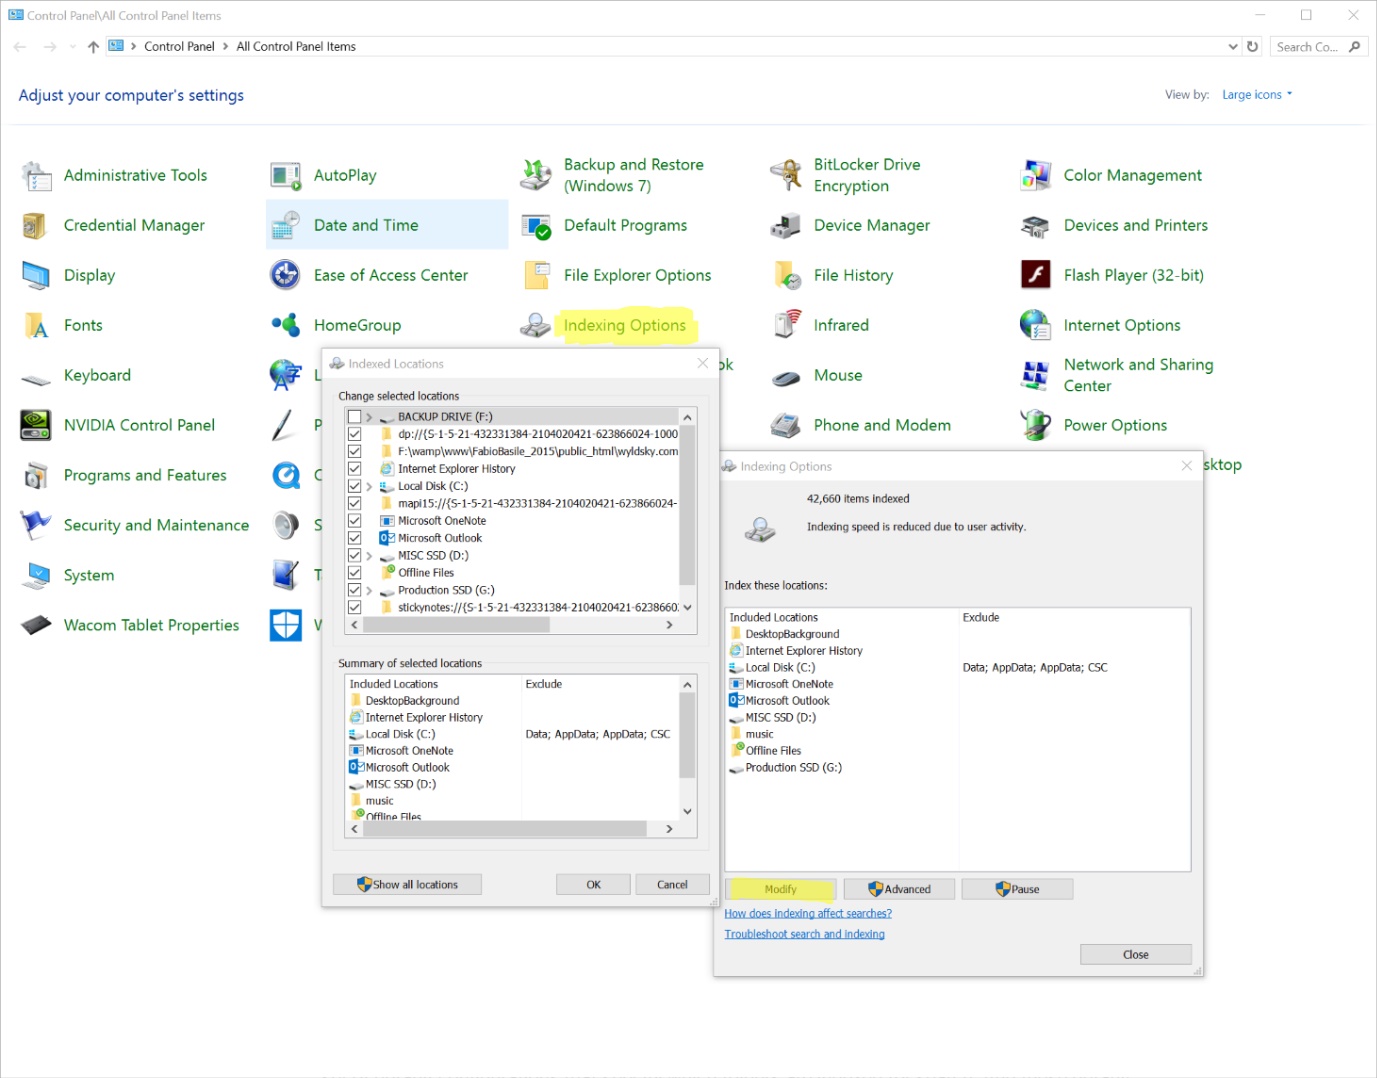
Tweaking the search capabilities of the indexing service on Windows 10 is a pretty straightforward process. Simply type into Cortana’s search box “Indexing Options”, which will list the Indexing Options desktop app. Clicking on it will open the Indexing Options dialog, where a list of all indexed locations will display.
Typically, the C drive, Start Menu, Internet Explorer history, Offline Files, and DesktopBackground, will be the default locations on a freshly installed system. Clicking on “Modify” will enable you to add more locations, while clicking on “Advanced” will enable the indexing of encrypted files.
Indexing as much of your system volumes as possible, will speed up the search of files within the system, considerably, especially on a system where much of the storage is SSD.
Fortunately, nearly all new laptops and 2-in-1’s storage options include SSD’s in one form or another, whether they are hybrid drives, like Fusion drives on MacBooks, smaller flash drives such as the ones included in Chromebook laptops, or more hefty (and pricey) SSD’s, typically half or a full Terabyte, included in some of the most high-end systems, like Microsoft Surface Book.
Ready to shop?
PortableOne has the best deals on Windows 10 Pro laptops, featuring the latest hardware-based security features, and full BitLocker encryption to protect your files from prying eyes.